
Kym Eaton
Posted on 05th December 2023
PowerEPOS makes building floor plans easy. Setting up floor plans to reflect the layout of your venue and table stage is a great way to get quick, at-a-glance information, assisting staff in providing fantastic service and smoothing out the customer experience.
In this guide, you will learn how to build floor plans that reflect your business trading areas and add service modes and colour coding to incorporate table management functionality into your floor plans.
Learning areas:
Create a new floor plan
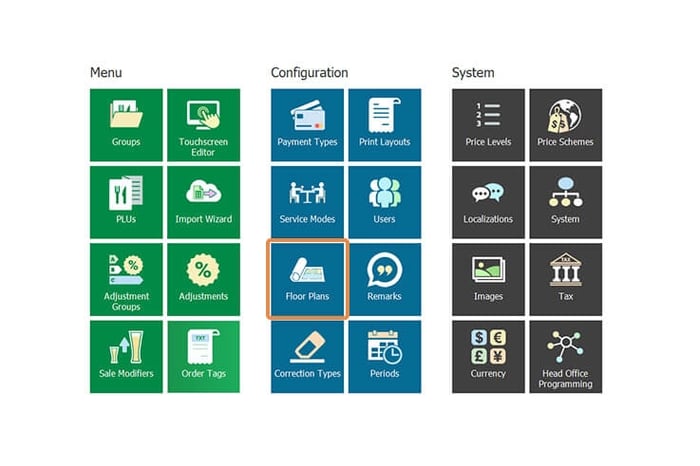
1. From the Management Console select the Floor Plan tile.
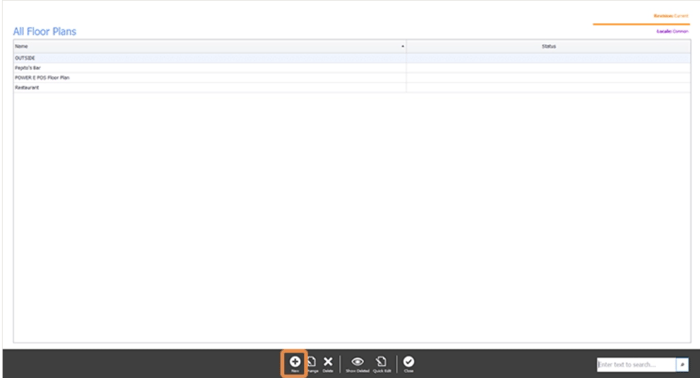
2. From the control panel at the bottom of the screen, select New.
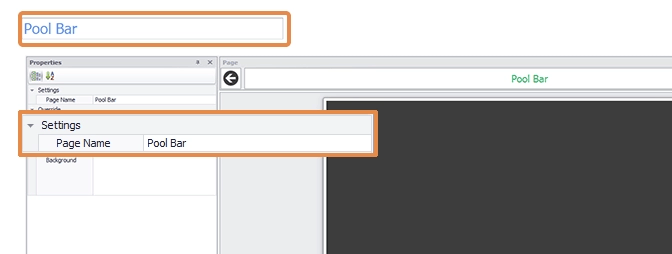
3. Give your new floor plan a name. We will call our name Restaurant and add the name to the name fields at the top left of the screen and under settings.
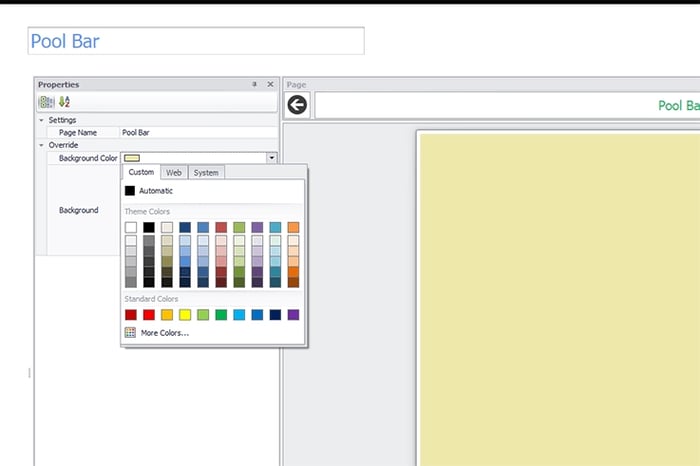
4. Next, we will add a background to our floor plan. To add a colour to the background, we make sure Page Settings is selected in our Control Panel then we move to the Properties panel and select the colour for our background.
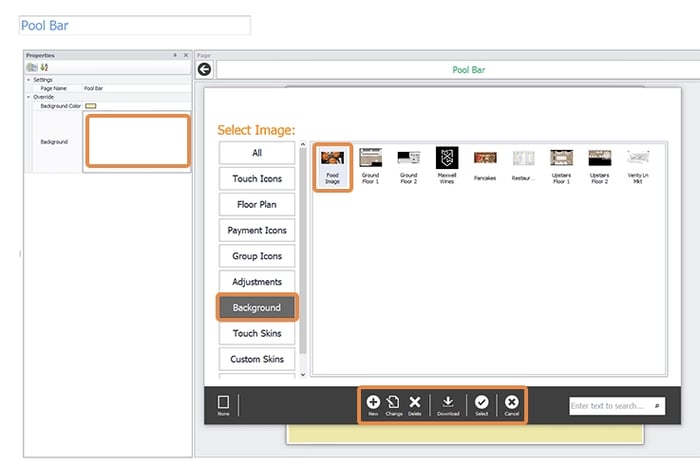
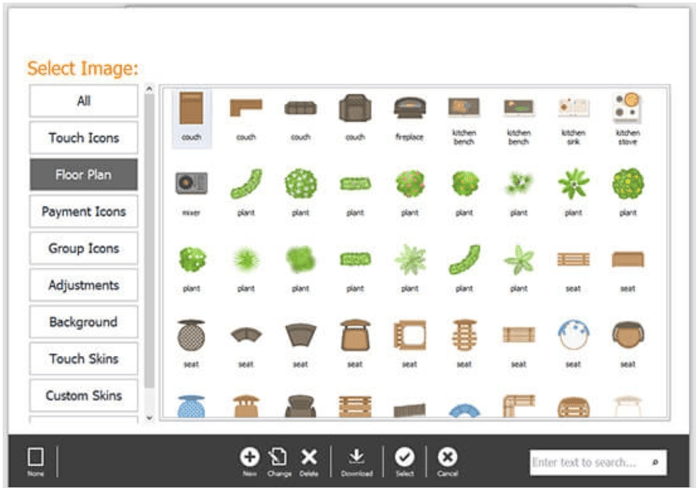
5. To add an image to the background instead, click into the Background field to open the Graphics Library, then we can either double-click the image to select the background or use the buttons in the control panel.
Apply a Service Mode to a floor plan
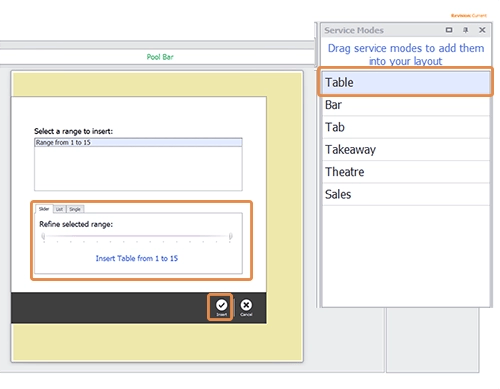
1. Service Modes that have been preconfigured are available from the Service Mode panel top right of the screen. To add Table Service Mode to our floor plan we click and drag Table from the Service Mode panel on to our floor plan which then opens the Table Range window. We will add all 15 tables to this floor plan so we select Insert from the Control Panel. If we wanted only to add 10 tables we could use the slider or list to limit the number of tables to be added.
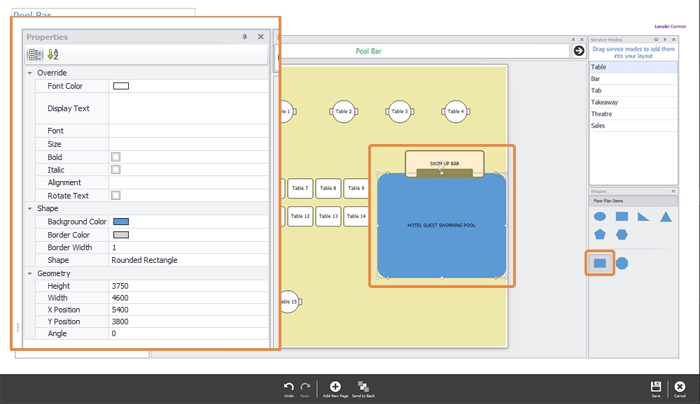
2. Next, we use drag and drop to move our tables to the correct positions in our floor plan. Then we select and format each table and using Properties. Here we can change the table size, shape and number, add seats, and update the text. Now our tables closely represent the layout of our pool bar.

Add shapes and images
Now we will add shapes and images to represent other items in our floor plan.
1. First, we will use shapes to add the pool and pool bar. From the shapes panel bottom right of the screen, we drag and drop the rectangle on to our floor plan. Next, we use the handles to resize and reshape it. We do the same thing using 2 rectangles to create the swim-up bar. Use properties to make further changes to the shapes such as changing colours and adding text.
2. To add images, we open the Graphics Library by clicking Insert Image from the Control Panel. Then we locate our image and double-click our image (or use the controls from the Control Panel) to add it to our floor plan. Once added to the floor plan, images can be resized and repositioned as required.
Please note: All images must be added individually from the Graphics Library. Although copying and pasting images in the floor plan might seem to work, the image properties are not transferred to the new images and therefore the images that have been copied and pasted will not be saved.
3. Our floor plan layout now looks like our pool bar.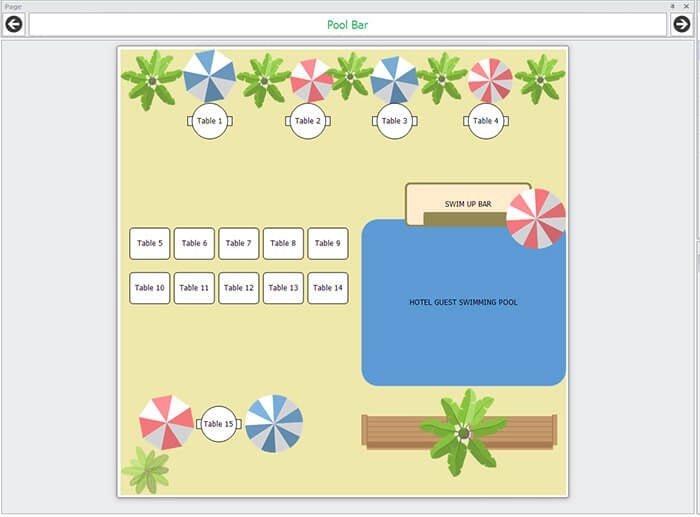
Apply Table Management settings
Next, we will add Table Management settings to our tables to visually indicate the stage that each table is at during service.
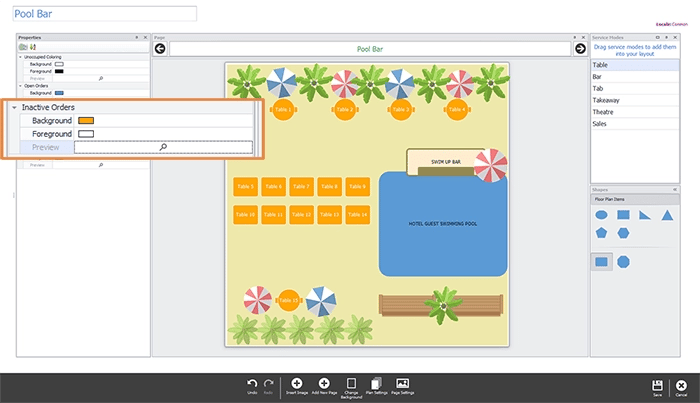
1. First select Plan Settings from the Control Panel. This will open the Table Management properties panel. Then we select the colours to indicate when tables are unoccupied, have open and inactive orders, and when the receipt has been printed and the table is ready to be vacated.
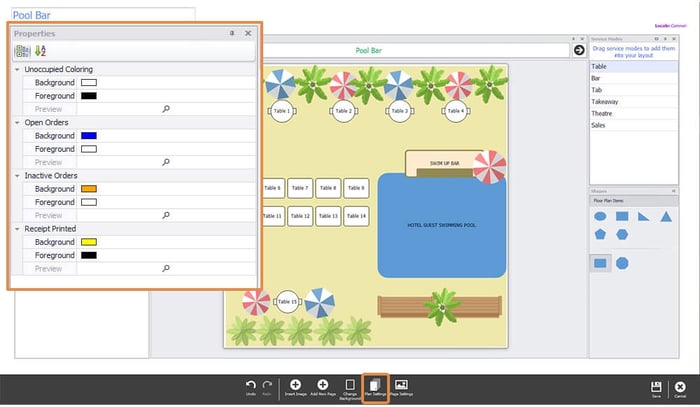
2. Finally, we can view the colour scheme by clicking Preview.
Now that our floor plan is complete we hit Save and Close to exit the floor plan builder and then Close to exit the floor plan module which brings us back to the Management Console.
Publish floor plans to individual Point of Sale devices
But this is not the end of the process. We still need to assign our floor plan to the Point of Sale terminal in our pool bar. This step is required because floor plans are assigned to POS terminals based on their location in the venue or outlet.
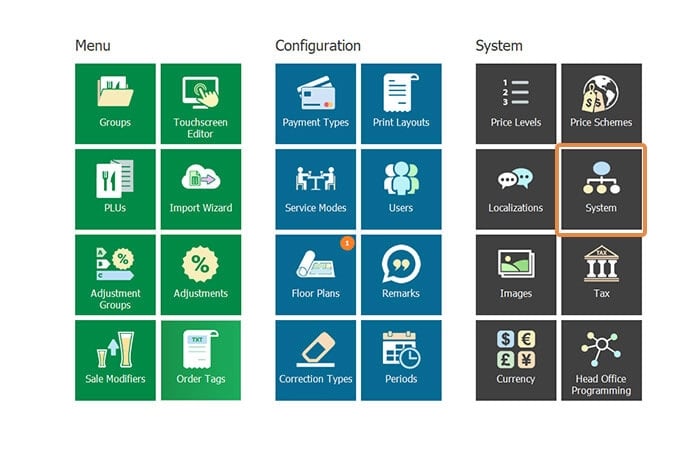
1. From our Management Console, we select the System tile which will open the System Module.
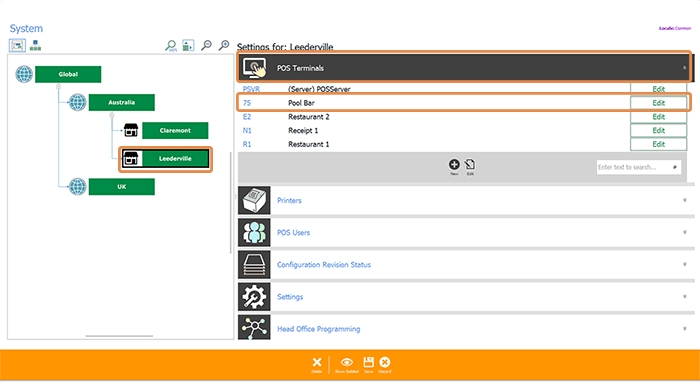
2. We select the outlet we publish our floor plan to, Leederville, and then POS Terminals which displays the POS devices for this outlet. Then we locate the Pool Bar and hit Edit which will open the POS Terminal Configuration window.
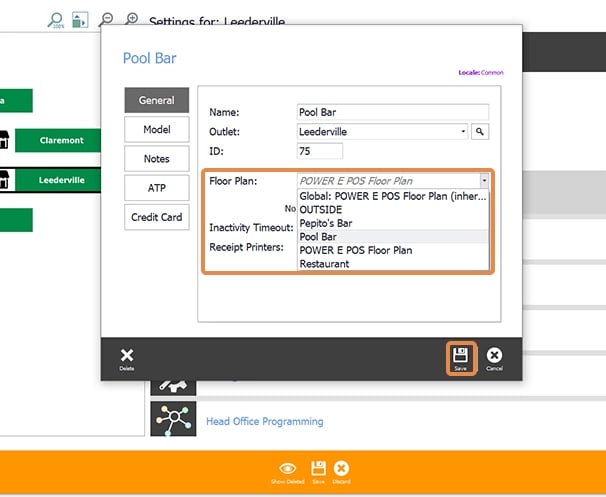
3. Then we locate the Floor Plan drop-down field and select Pool Bar and Save. Then Save and Close to close the System Module which brings us back to the Management Console ready to publish our new settings.
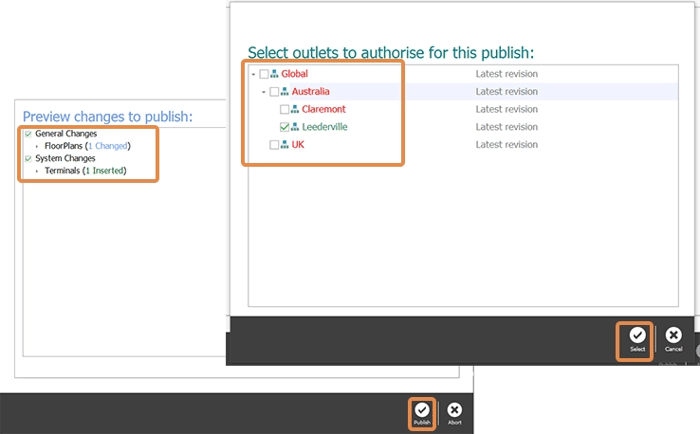
4. We hit the publish button top right of the screen.
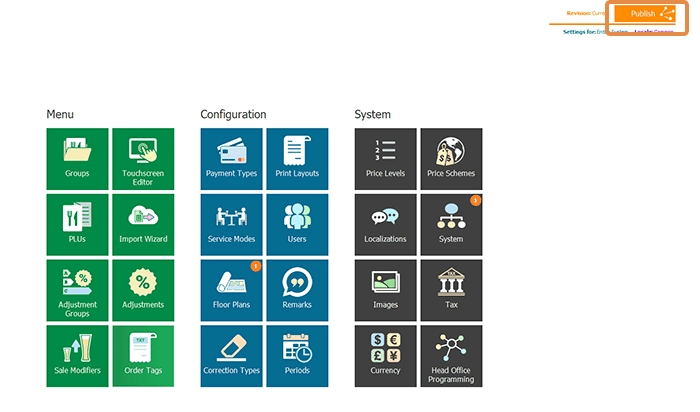
5. Then finally we check changes we are about to publish and make sure we only check our outlet, Leederville, to publish our changes to. Once published we receive a Complete message with a revision number that we can use to wind back changes in the Revision Management Tool if necessary.
Download the Building Floor Plans PDF Guide
Need more Info?
If you've still got questions, just email us at Triniteq Support or call us on 1300 784 276.