

Kym Eaton
Posted on 3rd July 2023
PowerEPOS provides a range of settings to simplify and customise how your products are organised and displayed in your POS.
PLU (short for Price Look Up) numbers are the codes that POS systems use to identify and locate information components within the system, such as products and instructions.
When a new product or instruction is added, a PLU number is allocated, and other settings configured such as printers and reporting groups.
This guide will teach you how to manually add PLUs and configure the settings to manage PLU workflows.
Learning areas:
![]() Add a PLU
Add a PLU![]() Configure general PLU settings
Configure general PLU settings![]() Configure Groups
Configure Groups![]() Configure Pricing
Configure Pricing![]() Configure Prompts
Configure Prompts![]() Configure Printers
Configure Printers![]() Configure Flags
Configure Flags![]() Configure Barcodes
Configure Barcodes![]() Send PLU settings to the Point of Sale
Send PLU settings to the Point of Sale
Add a PLU
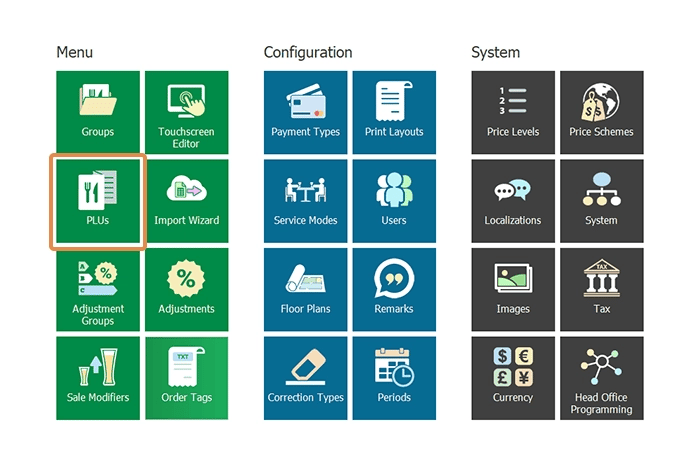
1. From the PowerEPOS Management Console select PLUs which will open the PLUs Module.
2. Select New from the central Control Panel to open the PLU Configuration window.

Configure general PLU settings
Now we can configure the settings for the PLU.
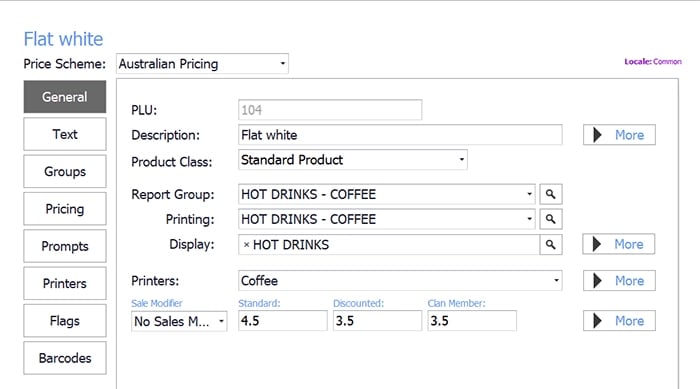
- Price Scheme - The Price scheme is set up in the Pricing Module. We have selected Australian Pricing but we could also leave this setting as the default pricing.
- PLU - This number is prepopulated
- Description - This is the name of the product or instruction. For our purposes, we have added Flat White.
- Reporting Group - Reporting groups are set up through the Groups module and categorise PLUs into groups for reporting purposes.
- Printing (Group) - This setting assigns the PLU to a group of PLUs that will print together on a docket.
- Display (Group) - This setting assigns the PLU to a group of PLUs which are displayed together on the POS touch screen.
- Printers - This setting selects the Printer Role that the PLU is assigned to.
- (Pricing) Sales Modifier - Here we can add a sales modifier that has been previously set up through the Pricing Module.
- (Pricing) Standard - Here we add the standard price for the PLU.
- (Pricing) Discounted - Here we can add a discounted price (although we usually set these up through the Pricing Module)
- (Pricing) Clan Member - Here we can add a clan member (or loyalty discount) price.
Configure PLU text settings
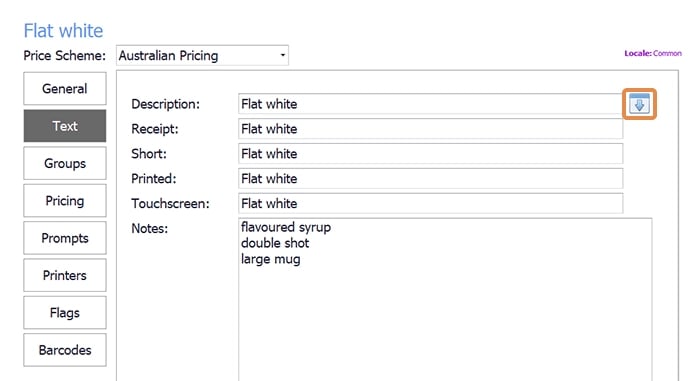
In this section, we configure how the text will look for the PLU in different places. Because we can name our coffee Flat White in all areas, we can use the arrow button on the right to copy the text to all fields. If your PLU has a longer name, you can add different descriptors for each purpose.
Configure PLU group settings
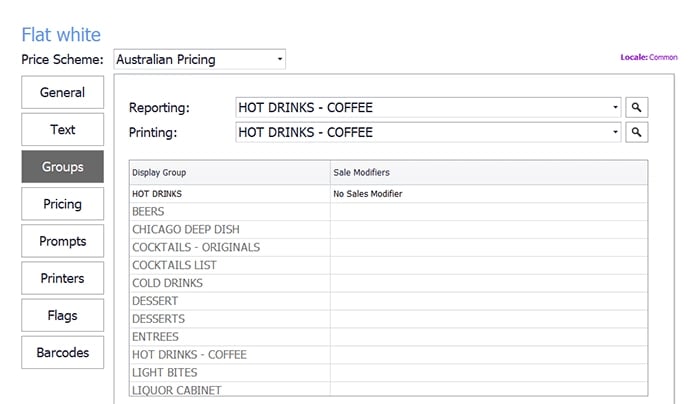
This section allows us to reconfigure our Reporting and Printing Groups if incorrect. We can also view (but not add) the Display Groups and Sales Modifiers available for this PLU.
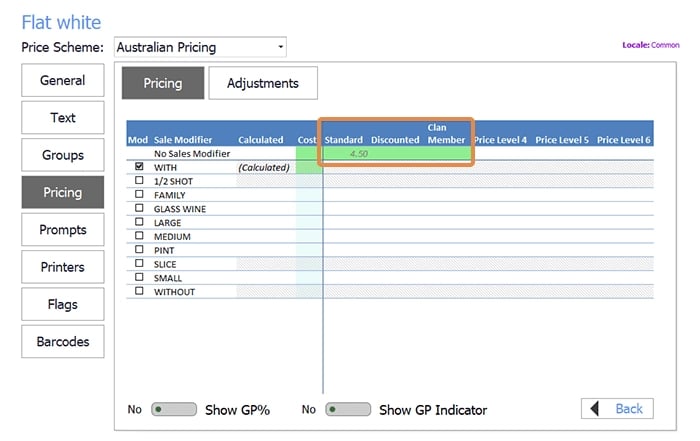
Configure PLU pricing settings
This green section in Pricing settings duplicates the pricing we set in General settings and we can add further sales modifiers to the price.
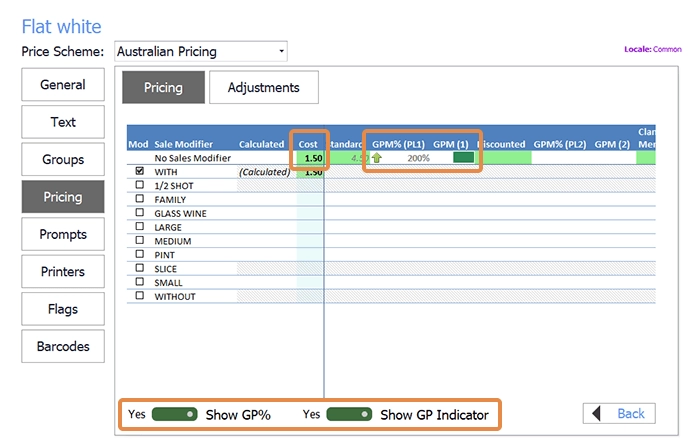
If we know the cost of a PLU we can add it under Cost and then toggle the Show GP% (Gross Profit) and Show GP Indicator buttons on to give a quick indication of PLU profit at differing price levels.
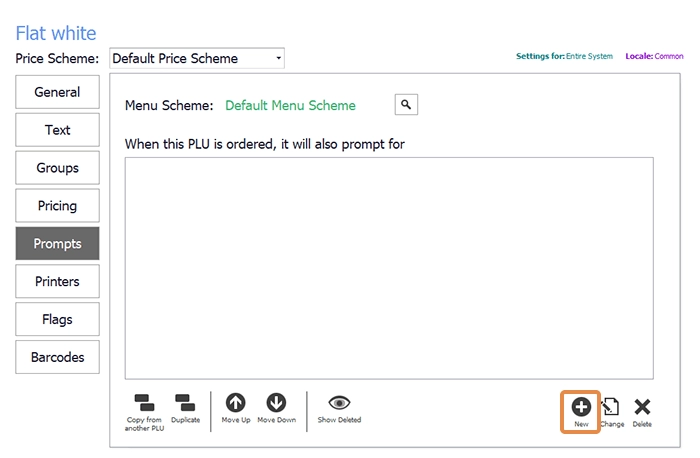
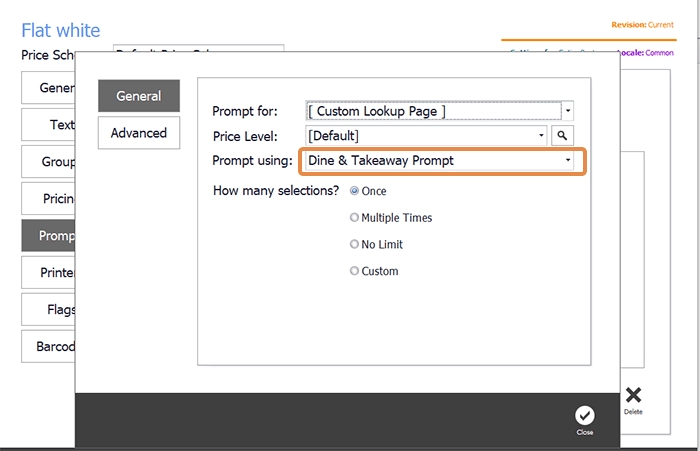
Configure PLU Prompt settings
A Custom lookup page has been previously set up through the Touch Screen Editor and we select this to add as a prompt for servers to check whether the customer wants their flat white for dine-in or takeaway.
For more information on setting up custom lookup pages and using the Touch Screen Editor, watch our video Setting up your POS screen.
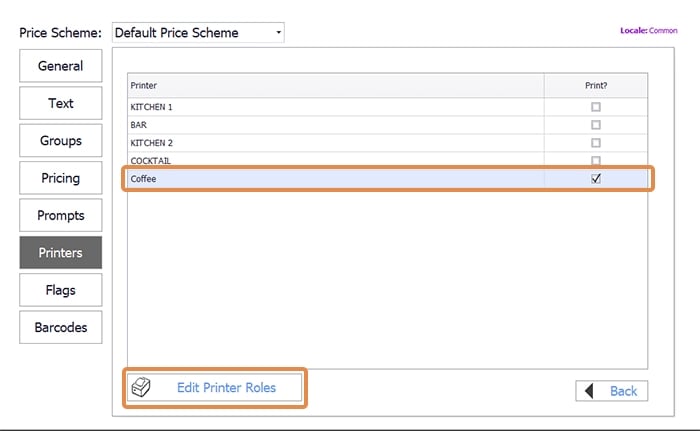
Configure PLU Printer Role settings
Instead of mapping PLUs directly to production area printers, we map them to Printer Roles instead. This allows us to move PLUs as a group from one printer to another if there is an issue.
In the Printers section, we can change the Printer Role previously set up for this PLU and we can use the Edit Printer Roles button to quickly add a new Printer Role if necessary.
Please Note: Although we can add a new Printer Role from here, the Printer Role will not be automatically connected to a printer. To connect the Printer Role to a printer, Printer Roles must be accessed through the System tile from the Management Console. Please watch our video Mapping PLUs to Printers for more information on Printer Roles.
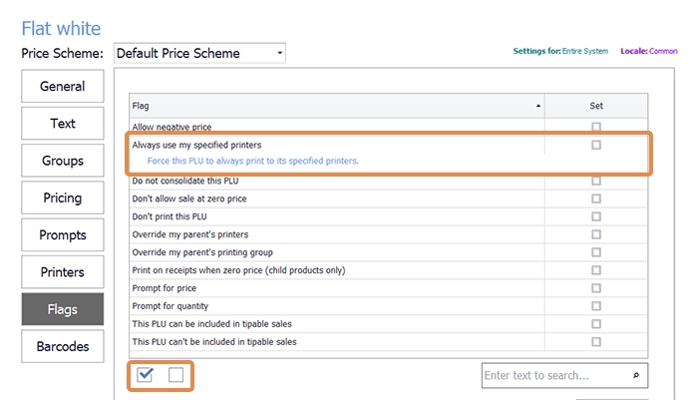
Configure further PLU settings (Flags)
Through the Flags section, we can configure the rest of the settings for the PLU. For a description of each setting, we simply click into each flag. We can also select or deselect all settings using the checkboxes below.
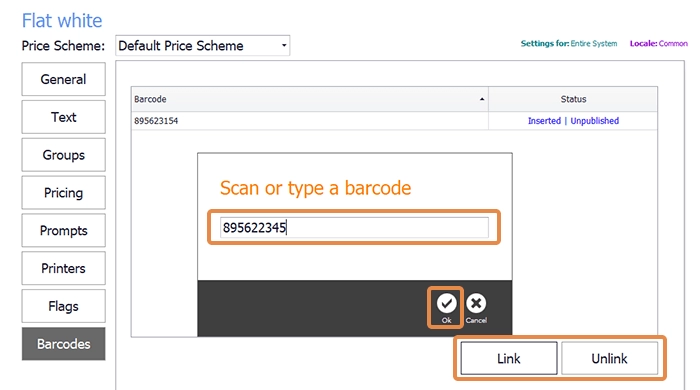
Configure PLU barcode settings
Finally, we can add a barcode to our PLU by either typing in the barcode number or scanning the barcode. To add a barcode, we click Link, type the code then OK. To remove the barcode we select the barcode and click Unlink. To add a barcode scanner please contact Triniteq Support .
Send PLU settings to the Point of Sale
Lastly, we save our PLU settings by clicking the Save button in the Control Panel and then Close the PLUs Module bringing us back to the Management Console.
1. Back in the Management Console, we can see that there are new settings ready to publish by the orange notifications on the Users and System tiles. So we click the Publish button, top right of the screen.
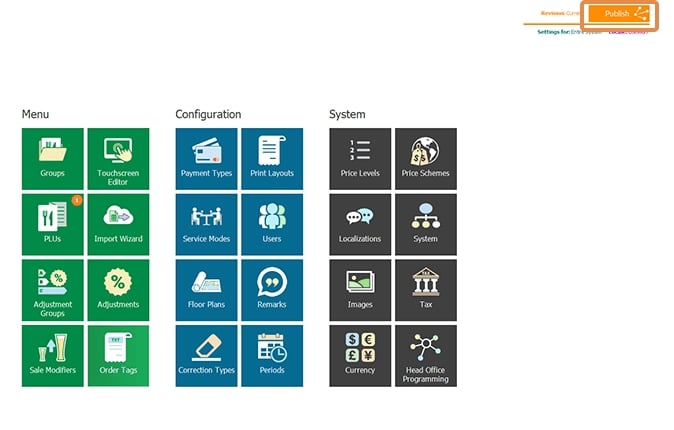
2. Then we check the changes and outlets we are publishing to, making sure to deselect any changes that we are not ready to publish and outlets we do not want to publish to.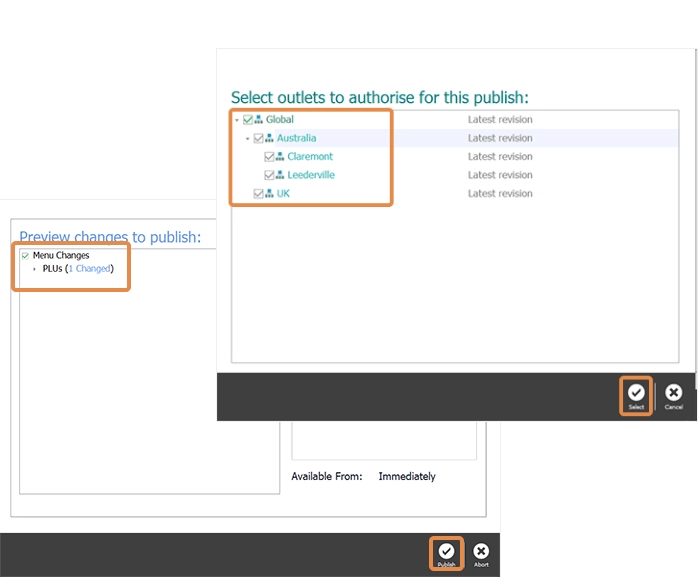
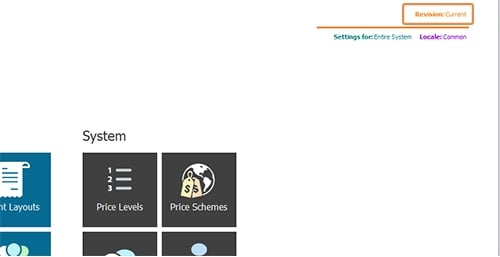
3. Once our changes are published, we receive the Complete message with a revision number which we can use to manage revisions in the Revision Management Tool accessible top right of the screen replacing the Publish button.

Download Creating PLUs PDF Guide
Still got questions?
Still got questions? Just submit them to us as Triniteq Support or call us on 1300 784 276 .